Archive
Install and configure VNC in 8 easy steps
1. Install vnc server rpm as per linux distribution you are using.
2. Once you will install vnc server you can check for the following commands listed below.

3. Now set the password for vnc sessions by executing command vncpasswd

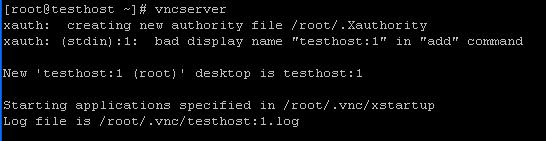
4. Once password is set you can run the command vncserver which will create a file .Xauthority and a folder .vnc in user’s home directory with all the configuration files. It also starts the first session for client.
5. Now we have to kill the vnc session as before connecting we have to configure vnc properly. To kill a vnc session you have to use the following command shown in the figure.

Here: 1 is the vnc session id.
6. Now open .vnc/xstartup file to modify the parameter. Beginning the file looks like below

7. Now uncomment the 3rd and 4th line containing unset and exec command. Keep the next two lines as it is (uncommented).Comment out the rest lines of the file. At the end add a startx command. After making the changes the content should look like below.

N:B:-This is for GNOME Desktop Environments. For KDE Desktop environment you have to mention startkde & at the end instead of startx &
Now start the vncserver. That’s all configurations from server side.
8. Now open the vnc viwer from client side.It will ask for servername and password.

Now Give the server as hostname: session id or IP address: session id .It will ask for password and you will get the remote desktop screen after successful authentication.
9. If your client system is a Linux system then install vncviewer rpm. Then you can connect to remote system by executing vncviewer command.
